Search Private Access Codes
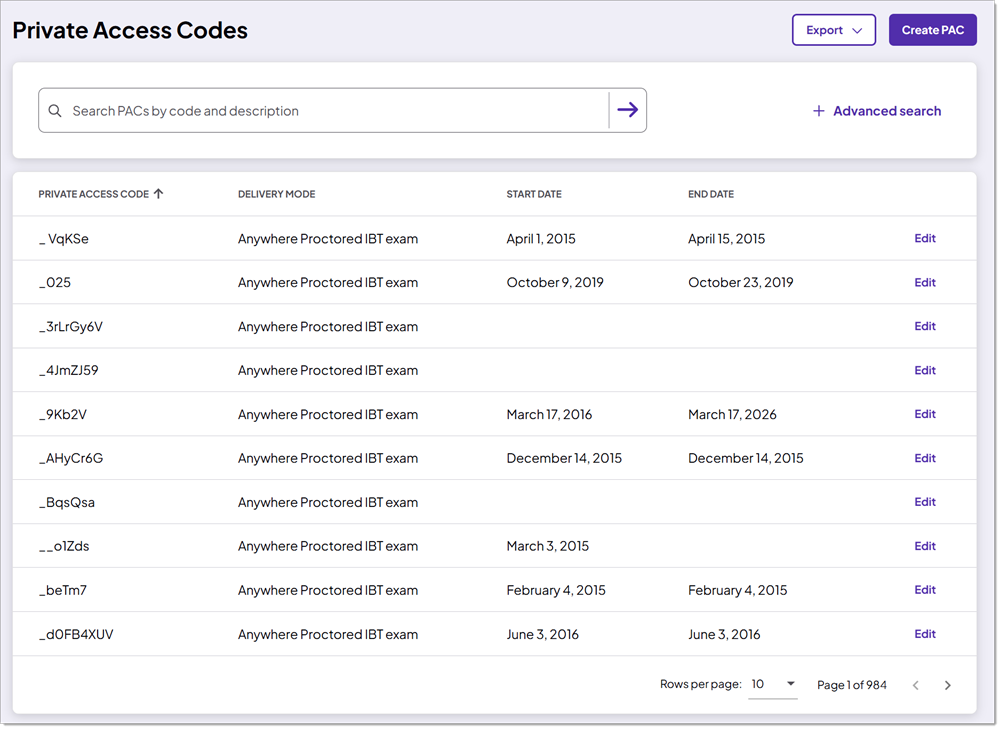
By default, when you access the Private Access Codes application, all PACs are displayed in the list. The PACs are displayed 10 per page by default so you do not have to scroll through a long list of PACs. ![]()
![]() You can search for the desired PAC using a simple search or an advanced search to locate the desired PAC.
You can search for the desired PAC using a simple search or an advanced search to locate the desired PAC.
Scroll through pages of PACs
When a client has a large number of private access codes, the system displays the list of PACs in groups of 10 per page by default. The number of pages is displayed in the lower right corner of the PAC list.
- Select the left and right arrows next to the page numbers to display the PACs a page at a time.


- Select the First link to move to the first page.
- Select the Last link to move to the last page.
Change number of rows on a page of PACs
The system displays the list of PACs in groups of 10 per page by default. You can choose to view more or fewer results on a page at a time, from 5 to 50.
- Select the Rows per page dropdown to display the options.
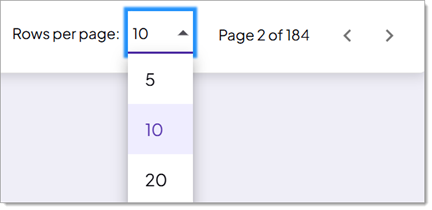
- Select the number of rows you want displayed per page.
- The page automatically refreshes with the new number of rows displayed.
Search for a PAC
If you have a large list of private access codes, it is not efficient to tab through the list of PACs. You can do a simple search for a PAC by the Private Access Code name or the Description field. By default, a simple search returns all PACs that match the Private Access Code name or description you enter. The search returns both active and inactive PACs.
Search for PAC
The simple search locates any PACs that contain the search text in either the PAC Code name or within the PAC description.
- Select the Search PACs by code and description field.

- Type in the search text.
- Select the arrow button or press the Enter key on the keyboard.
The list is filtered based on the search text entered.
Clear a search
Select the X in a circle icon in the search field to clear the text and display all PACs for the client.
![]()
Sort PACs
By default, the list of PACs is displayed in ascending order by private access code. There is an up arrow ![]() next to the Private Access Code column header indicating the list is sorted in ascending order.
next to the Private Access Code column header indicating the list is sorted in ascending order.
- To sort the list by a different column, select the arrow
 next to the desired column.
The column is sorted in ascending order.
- Select the arrow again to sort the column in descending order. The button now changes to a down arrow
 .
.
Advanced search
Using the Advanced Search option allows you to search for private access codes by Delivery mode, Private Access Code, Description, Assigned to All exams/Specific exam groups/Specific exams, and by date ranges. When you use the advanced search filters, the results must match all the search filters you apply. For instance, if you select Anywhere Proctored IBT exam delivery mode, exams within a specific date range, and Specific exams My test 1 or My Test 2, only PACs set for My test 1 or My test 2 exams within the date range and Anywhere Proctored IBT exam delivery mode are displayed in the search results.
Search by Delivery mode, Private Access Code or Description filters
- Select the Advanced Search button.

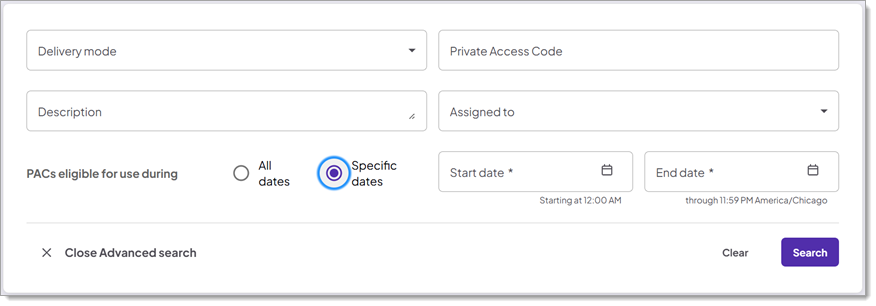
The Advanced search box expands. ![]()
![]() The list of private access codes is moved down on the page below the advanced search box.
The list of private access codes is moved down on the page below the advanced search box.
- Select the Delivery mode drop-down list and select the desired delivery mode.
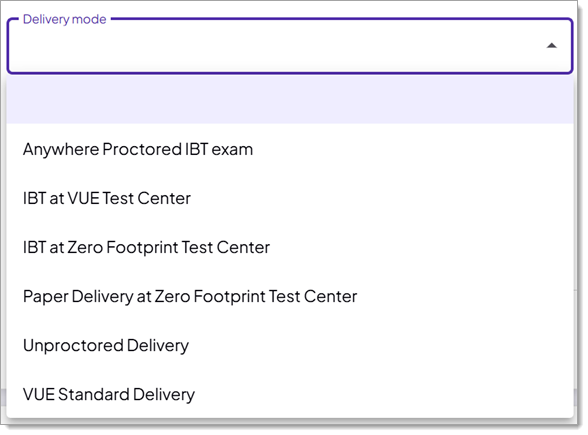
- Anywhere Proctored IBT exam
- IBT at VUE Test Center
- IBT at Zero Footprint Test Center
- Paper Delivery at Zero Footprint Test Center
- Unproctored Delivery
- VUE Standard Delivery
The PAC delivery mode is used for the following exam delivery types:
|
PAC DELIVERY MODE |
|
EXAM DELIVERY TYPE |
|---|---|---|
|
Anywhere Proctored IBT Exam |
= |
Client proctored - no appointment required |
|
IBT at VUE Test Center |
= |
Test Center IBT delivery |
|
IBT at Zero Footprint Test Center |
= |
Client proctored - appointment required |
|
Paper Delivery at Zero Footprint Test Center |
= |
Paper Delivery |
|
Unproctored Delivery |
= |
Unproctored Delivery |
|
VUE Standard Delivery |
= |
Delivery on Athena — Desktop Edition test driver |
- Type the desired search text in the Private Access Code field.
- Type the desired search text in the Description field.
- Select the Search button in the Advanced search dialog box.
The list is filtered to display the PACs meeting the search criteria. The screen focus shifts down to the list below the advanced search box. You can scroll back up to change your advanced search filters. You can collapse the Advanced search box by selecting the X in the upper right hand corner of the advanced search box, or you can select the Advanced search button to collapse the Advanced search box.
Search by Assigned to All exams
- Select the Assigned to drop-down list.
- Select All exams from the list.

- Select the Search button
 in the Advanced search dialog box.
The list is filtered to display the PACs meeting the search criteria. The screen focus shifts down to the list below the advanced search box. You can scroll back up to change your advanced search filters. You can collapse the Advanced search box by selecting the X Close Advanced Search in the lower left corner of the advanced search box.
Search by Assigned to Specific exam groups
You can search for PACs that are assigned to specific exam groups. If more than one exam group is selected, the search finds any PACs that apply to either exam group. For example, if you choose Group A and Group C, all PACs that are in either Group A or Group C are displayed in the list.
- Select the Assigned to drop-down list.
- Select Specific exam groups from the list. This allows you to locate PACs that are associated with any exam groups.
The Specific exam groups field appears.
- If you want to identify a PAC associated with a specific exam group, select the Specific exam groups drop-down list and select the desired exam groups from the list.
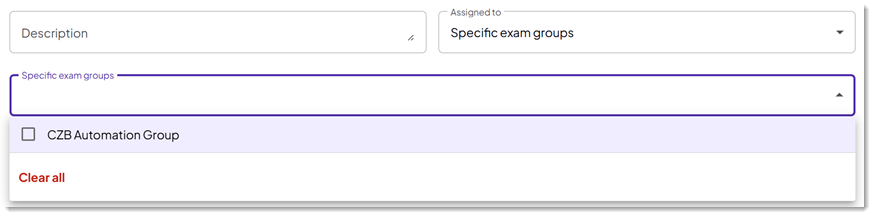
- The exam groups are added to the Specific exam groups field.

- To remove an exam group, open the Specific exam groups dropdown and deselect the checkbox next to the exam group.
- Select the Search button in the Advanced search box.
The list is filtered to display the PACs meeting the search criteria. The screen focus shifts down to the list below the advanced search box. You can scroll back up to change your advanced search filters. You can collapse the Advanced search box by selecting the X Close Advanced Search in the lower left corner of the advanced search box.
Search by Assigned to Specific exams
You can search for PACs that are assigned to specific exams. If more than one exam is selected, the search locates any PACs that apply to either exam. For example, if you choose My test 1 and My test 2, all PACs that are applied to either My test 1 or My test 2 are displayed in the list.
- Select the Assigned to drop-down list.
- Select Specific exams from the list. This allows you to locate PACs that are associated with specific exams.
The Specific exams field appears.
- If you want to identify a PAC associated with a specific exam, select the Specific exams drop-down list and select the desired exams from the list.
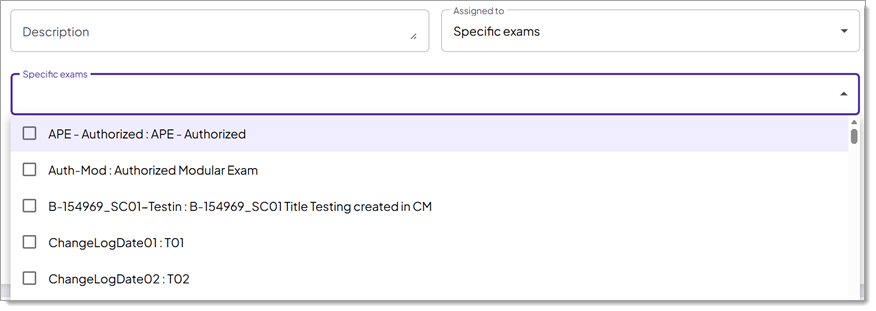
- The exams are added to the Specific exams field.

- To remove an exam, open the Specific exams dropdown and deselect the checkbox next to the exam.
- Select the Search button in the Advanced search box.
The list is filtered to display the PACs meeting the search criteria. The screen focus shifts down to the list below the advanced search box. You can scroll back up to change your advanced search filters. You can collapse the Advanced search box by selecting the X Close Advanced Search in the lower left corner of the advanced search box.
Search by PACs eligible for use during a specific date range
By default, when you perform an advanced PAC search, you are searching for PACs that are or were active in all dates. You have the ability to search for PACs that are or were active within a specified date range.
|
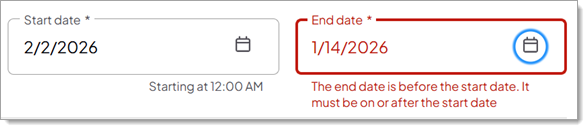
If you choose to select a specific date range for your search, you must supply both a start date and an end date. All PACs that are or were active within the date range are returned in the search results.
|

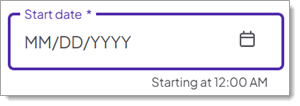
- Select the Specific dates option button. The Start date and End date fields appear.

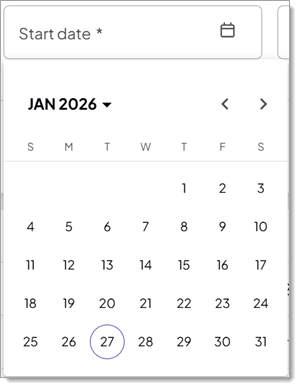
- Select the Start date and End date fields and enter the desired dates in each. You can enter a date in MM/DD/YYYY format or use the calendar to select a date in each field.
|
|

|
|
|
|
- Select the Search button in the Advanced search box.
The list is filtered to display the PACs meeting the search criteria. The screen focus shifts down to the list below the advanced search box. You can scroll back up to change your advanced search filters. You can collapse the Advanced search box by selecting the X Close Advanced Search in the lower left corner of the advanced search box.
See Export Private Access Codes topic for details on exporting PACs.
Pearson VUE Proprietary and Confidential