View an event
Proctoring administrators are allowed to view events, change an event name, and refresh a candidate roster, but they cannot create events unless they are the Proctoring administrator and a proctor.
- Scroll through the list of events and locate the desired event.
- Select the event View button.
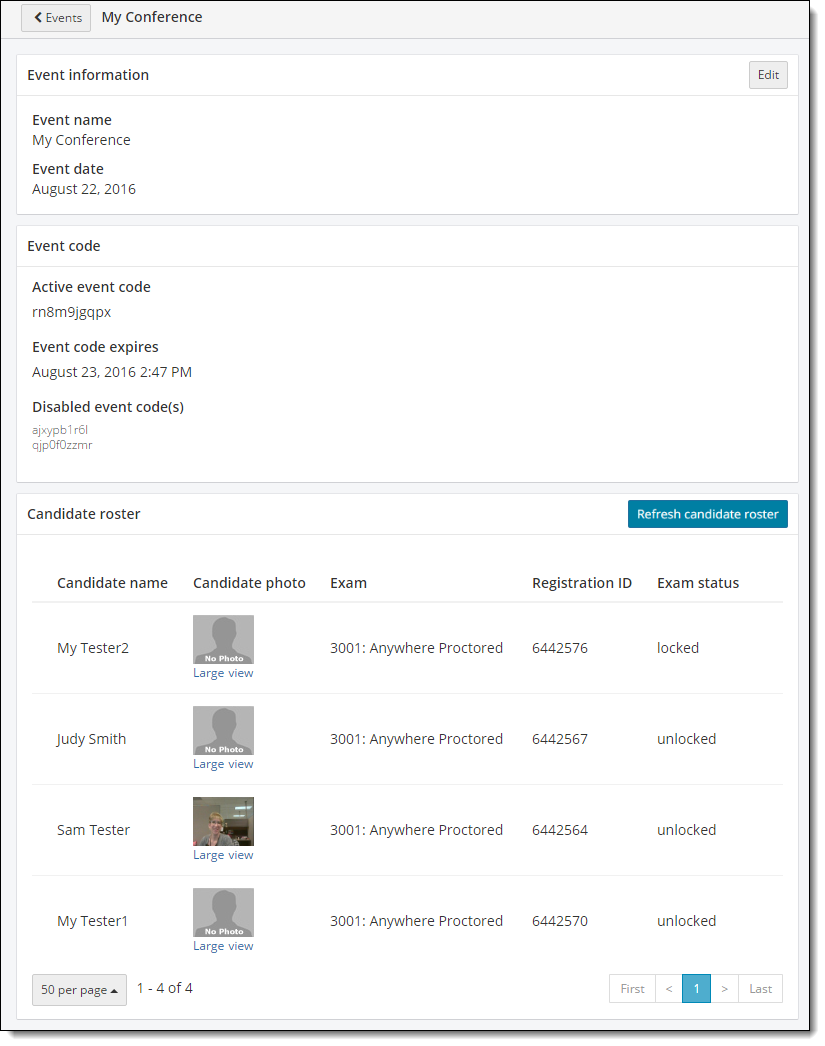
The Event Details page is displayed. The Event information including the event name and event date, the Event code including the current event code, the current event code expiration date and time, and any disabled or expired event codes, and the Candidate roster are displayed. ![]()
![]()
Edit event name
If proctors mislabeled an event or if you want to add the proctor's name to the event, administrators may edit event names.
- Select the Edit button in the Event information section.
- Modify the Event name.

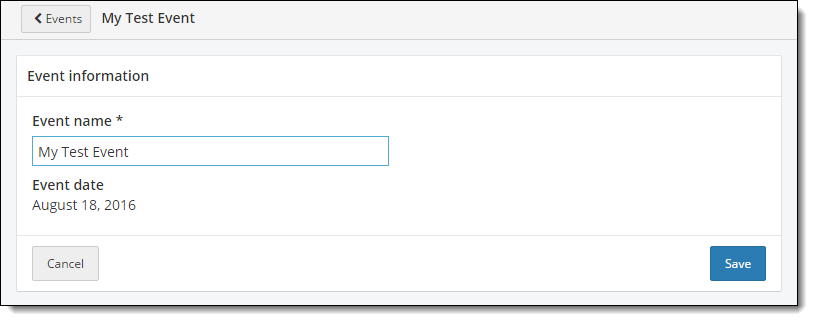
- Select Save.
A message states the event name has been successfully updated.
Refresh the candidate roster
When a roster is created, it is empty until a candidate enters the event code during the Client proctored - no appointment required admissions process for the exam. ![]()
![]()
![]()
Once candidates have entered event codes, the candidates are listed in alphabetical order by last name on the Candidate roster. ![]()
![]() All exams are locked until the proctor unlocks the exam.
All exams are locked until the proctor unlocks the exam.
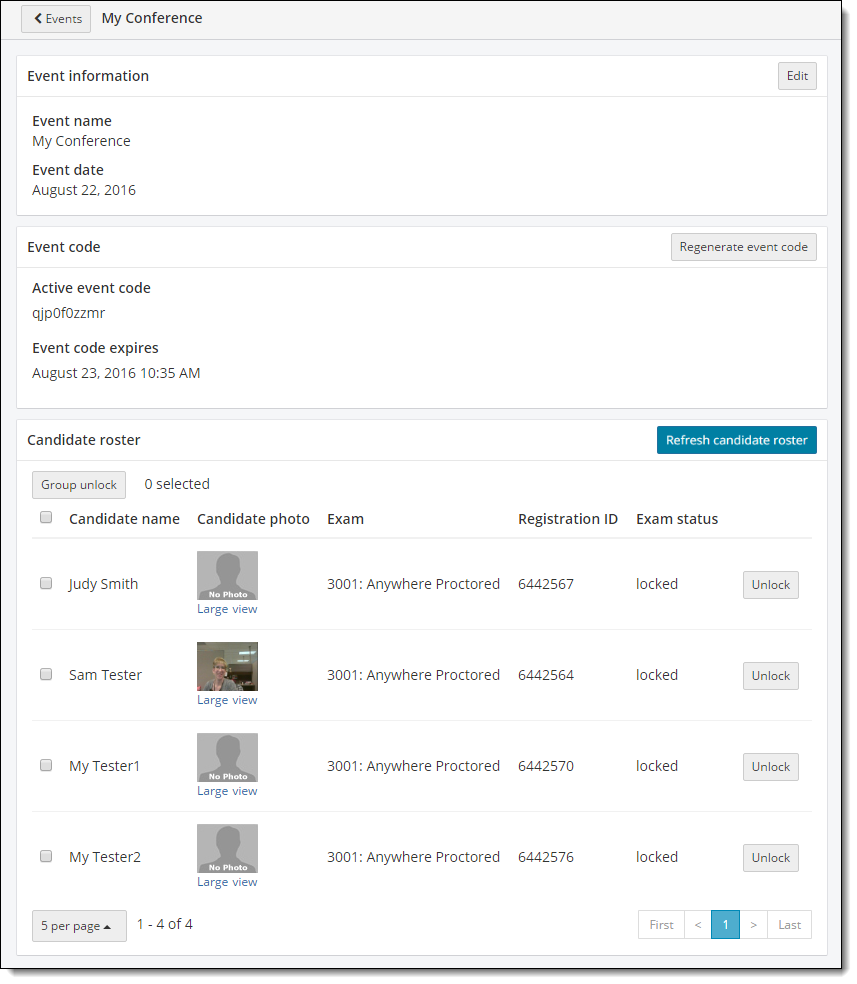
If individual exams were unlocked, all locked exams are listed at the top of the roster list in alphabetical order. All unlocked exams are listed in alphabetical order at the bottom of the list. ![]()
![]()
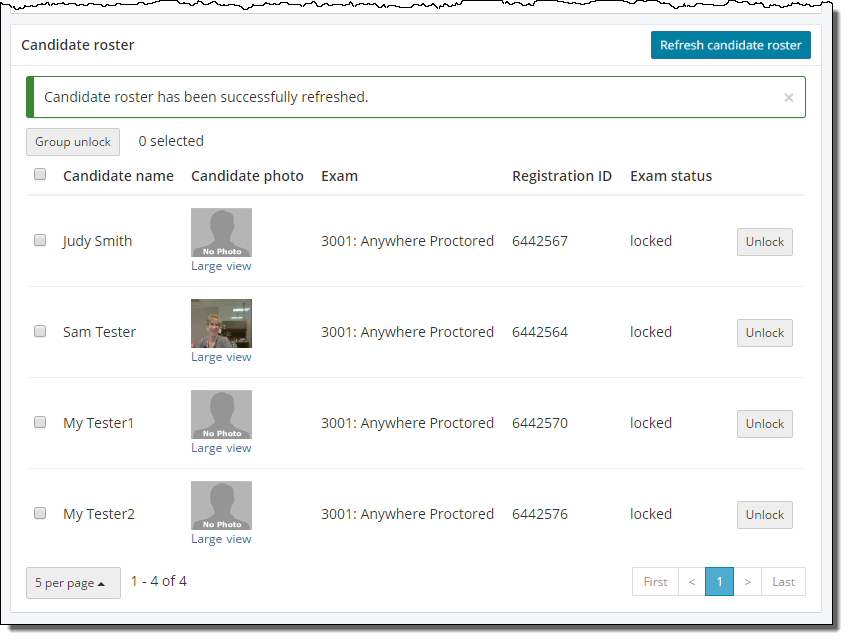
If proctors are in the middle of administering a Client proctored - no appointment required event, candidates may begin their exams at staggered intervals. Proctoring administrators have the ability to refresh the candidate roster in real time to see candidates as they are being admitted for exams and as their exams are being unlocked.
- Select the Refresh candidate roster button. A message states the roster has been refreshed.
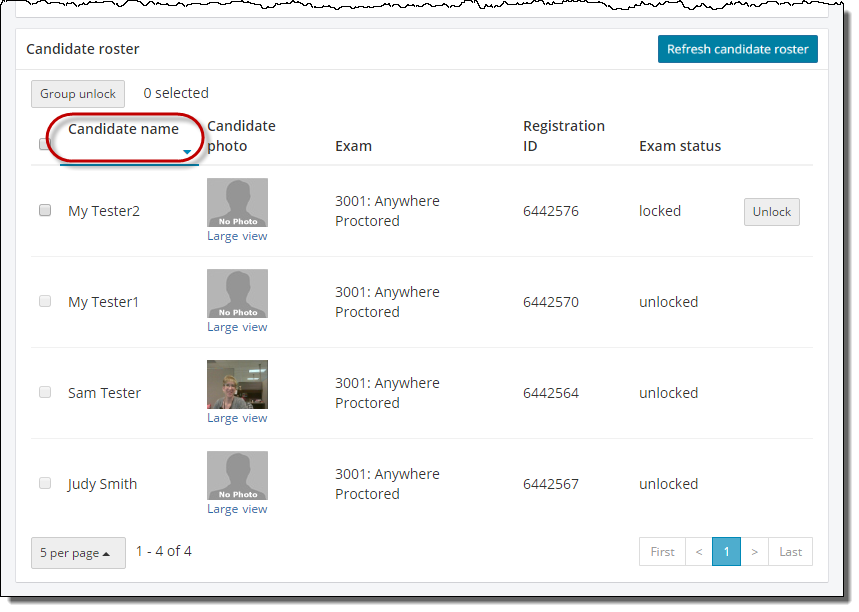
Sort the candidate roster
By default, the candidate roster list is sorted alphabetically by Candidate Name with all locked exams listed at the top of the roster and all unlocked exams listed below the locked exams. The Candidate roster may be sorted by Candidate name, Exam, Registration ID, and Exam status.
|
Once you sort the candidate roster by any other column, the locked and unlocked exams are no longer grouped together. If you wish to view the list in the original sort order, return to the Events list and then view the Event again. The sort order from the previous viewing is not retained. |
- Select the desired column heading title. The list is now sorted in ascending order and an upward pointing triangle is displayed next to the column heading.
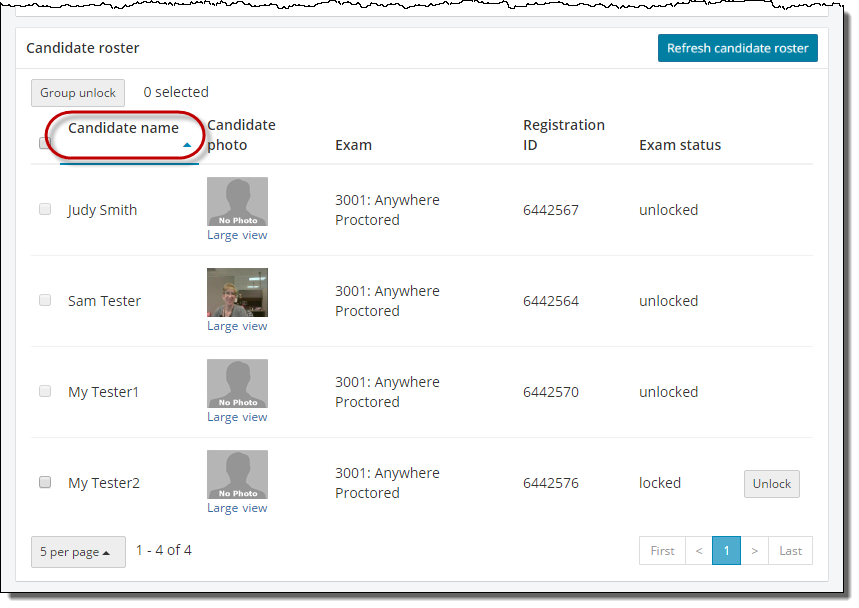
- Select the column heading again and the list is sorted in descending order. A downward pointing triangle is displayed next to the column heading.
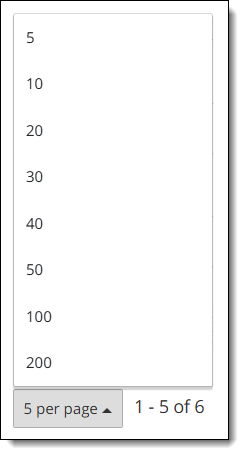
Change the number of candidates displayed on a roster
By default, 5 candidates are displayed on a roster. You can change that number.
- Scroll down to the bottom of the candidate roster list and select the 5 per page button
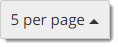 .
. - Select the desired number from the pop-up menu (5, 10, 20, 30, 40, 50, 100, or 200).
Scroll through pages of candidates on a roster
When a roster has a large number of candidates, the system displays the list of candidates in groups of 5 per page. The number of pages is displayed in the lower right-hand corner of the Candidate roster section.
- Select the page numbers to display the candidates 5 at a time.

- Select the First link to move to the first page.
- Select the Last link to move to the last page.
Return to the Events dashboard
- Select the Return to Events list button
 at the top of the Event Details page.
Pearson VUE Proprietary and Confidential